Erosion Control Charleston SC is the process of preventing or controlling erosion in agriculture, land development, and construction sites. Adequate erosion controls help avert nutrient pollution, sedimentation, and soil loss.
Erosion occurs when bare ground is exposed to wind and rain. When the roots of plants hold soil in place, it’s less prone to damage.
Plants have an important role in soil erosion control because they bind the earth together with their roots, slow down water flow and create natural barriers to wind and wave action. They also add organic matter to the soil, which improves its structure and makes it less prone to all forms of erosion. In addition, vegetation provides cover and shade for soil and wildlife.
Erosion occurs most often where there is bare ground, which exposes the earth to wind and water action. Erosion is more likely to happen on light, sandy or silty soils than heavy clay soils. It can also be more pronounced on slopes or embankments, where soil is displaced by raindrop impact and runoff. The presence of grasses, flowers, shrubs and trees can greatly reduce the amount of bare soil on your property.
Vegetation is the most natural and effective way to prevent erosion, as it binds the soil with its root systems and slows down the movement of rainwater and water runoff. The more extensive a plant’s root system, the better it is at reducing surface erosion. Plants with lateral, spreading root systems, such as ivy and creeping phlox, are more efficient at erosion control than vertically structured plants with tap roots.
Several species of ferns are excellent at stopping erosion, particularly those with long, feathery leaves, such as coastal and big leaf fern, and the wood fern (Dryopteris fimbriata). A common woodland plant, ostrich fern, is also good for stopping erosion in wet, shady areas. Other sedges that stop erosion include Pennsylvania, Appalachian and plantain leaf sedge.
Riverbank lupine (Lupinus arvensis) stops erosion by pulling water into its underground roots. It is a legume, so it adds nitrogen to the soil as well. Other lupines that are good for erosion control include bearberry, rockpray and willow leaf cotoneaster, all suitable for USDA zones 5 through 8. All of these have spreading roots that help to protect the soil. Other plants that are suited for shady, moist areas include moss, sweet-smelling heucherella and tri-colored periwinkle. All are available in seed blends and sod, although it takes four to six weeks for the latter option to take hold.
Retaining Walls
Retaining walls are structural features that can add interest and beauty to your yard. They are also a necessity in the fight against erosion. These structures stabilize slopes, prevent landslides, and create terraces for gardening and other uses. They also help to keep soil in place, preventing runoff into storm water sewers and rivers where it can damage or pollute our environment.
Homeowners can choose from a wide variety of materials, colors and textures to design a beautiful structure that blends with the landscape and complements their home’s aesthetic. However, retaining walls are not only functional — they add value to the property and can make it more appealing to prospective buyers.
Sloped areas are often difficult to use. Even a small amount of rain can cause soil to wash down the slope and erode, leaving behind unsightly debris or damaging your lawn or garden. With a retaining wall, it is possible to level and terrace the land for increased usable space. You can build a terraced area for new patios and decks, or plant eye-catching flower gardens and shrubbery.
A retaining wall can be constructed from many types of material, depending on your needs and budget. If your goal is to simply increase the attractiveness of the property, you can choose from a number of decorative options including natural stone, bricks or flagstones. If your primary goal is to combat erosion, you may want to consider a more sturdy and durable solution such as concrete or masonry.
In order to resist the immense pressures of a retaining wall, it is important that it be properly built and maintained. Checking for signs of damage and taking prompt action is essential. It is also a good idea to regularly monitor the soil behind your wall and to plant trees and other plants that will anchor the soil. This will help to prevent soil movement and promote healthy growth of the vegetation that you have chosen to plant.
There are several different types of retaining walls that can be used to combat erosion and create terraces. Whether you are building a simple gravity wall or a more complex structure, it is important to consult with a professional before beginning construction. This will ensure that the project is completed according to state and local regulations and will be able to withstand the environmental conditions where it is located.
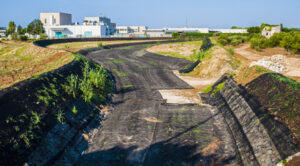
Sediment Basins
Sediment basins are open water ponds that capture coarse sediment and litter carried by stormwater, preventing it from entering waterways. They are a critical element in any erosion control system and should be used on every site, regardless of project size or construction duration.
The design of a sediment basin needs to be tailored to the specific site conditions. For example, very stony soils that are likely to generate a significant amount of inflow jetting will require the inclusion of a riffle/broad crested structure within the forebay to dissipate flow and minimise sediment accumulation (and consequently maintenance requirements). The design should also consider whether the basin needs to be lined or not. Lined basins are more durable, however the cost of lining can be prohibitive for smaller ponds.
Ideally, the design will include a high flow bypass weir or spillway to direct large flows away from the sediment basin and downstream treatment systems. The spillway should be armoured with rock to prevent scour and be designed to limit the frequency of sediment re-suspension.
It is important that the sediment basin is hydraulically efficient so that as much of the coarse sediment as possible can be settled. This is achieved by ensuring that the settling zone has an effective depth of 1.5-2m. This will reduce the volume of turbid water discharged from the pond, which in turn improves settling efficiency.
The use of baffles within the settling zone can also be useful to increase settling efficiency. These can be made from coir fibre, porous geotextiles or a turbidity barrier and are designed to disrupt the flow patterns in the pond, decrease velocities and encourage aggregation of fine sediment.
For sites where the use of sediment basins is not feasible, such as linear construction projects or when a site’s Right of Way does not permit for their construction, the focus must be on the implementation of all other reasonable and practicable erosion control measures. The monitoring of water quality parameters at these sites will be a key part of this.
Chemical treatment of the water entering and leaving a sediment basin is often required if sediment is not being effectively removed by the sediment basin alone. Jar tests will need to be conducted to determine which coagulant or flocculant is most appropriate for the site.
Storm Drains
Many people have heard the famous line from George Costanza in Seinfeld, “I don’t understand the difference between a storm drain and a sewer system.” The truth is that there is a major distinction. The main function of a storm drain is to transfer storm water away from city streets, houses and buildings. This water goes through a series of underground pipes and eventually ends up in lakes, rivers and the ocean.
A city’s storm drain system works well in theory, but it can be harmed by improper maintenance and lack of attention. While the water is being transferred, it picks up debris such as lawn chemicals, paint, household cleaners and oil that wash directly into a stream or lake. This pollution causes the erosion of streambanks and disturbs aquatic habitats.
The best way to help maintain a storm drainage system is to not dump anything down a drain. Instead, use your curbside garbage bins or make a compost pile. Do not blow grass clippings, leaves or plant debris down the street either. These materials can clog the storm drains and cause flooding or erosion in your neighborhood.
Storm drain grates are also a good tool in preventing erosion and floods. These can be installed in low areas of a parking lot, trenches and sidewalks. The idea is to have these grates redirect rainwater and melted snow away from homes, buildings and paved surfaces and into a natural body of water like a creek or river.
However, a storm drain can get overwhelmed during heavy rains or even a large hailstorm, and may begin to mix in sewage. This is why it’s important to limit the amount of debris that goes down a storm drain and to install detention tanks in a house or business to keep excess water from entering the public storm drainage system during heavy rains. This will prevent the drains from becoming inundated and can save you money on water bills. Alternatively, permeable pavements can be used in urban areas to allow rainwater to infiltrate into the soil or evapotranspire through vegetation.